This exercise explains how to create an ArcGIS QuickCapture project from scratch using ArcGIS Pro. You will create a pothole assessment project that will allow users to capture potholes of two sizes on different road surface types. As the user travels, they can capture the surface type of the road as a line feature, and when they come to a pothole, they can capture its location, distinguished by its size.
Create a feature service
To create a feature service in ArcGIS Pro, complete the following steps:
- Sign in to ArcGIS Pro and choose to create a new project using the Catalog template.
- Name the project Pothole Assessment and click OK.
- On the Catalog tab, select Databases.
- Right-click the Pothole Assessment.gdb file, hover over New and select Create new feature class.
The Create feature class wizard opens.
- Do the following in the wizard:
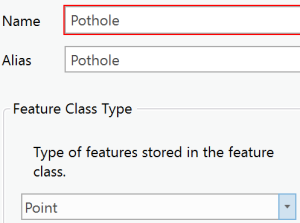
- Name the feature class Pothole.
- For the feature class type, choose Point.
- Click Next.
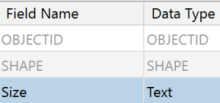
- Add a new field called Size and leave it as the default Text data type.
- Add the following fields: UserName (data type Text), Time (data type Date), Direction (data type Double), Speed (data type Double), Latitude (data type Double), and Longitude (data type Double).
Later, you will configure these fields to automatically populate when a record is captured.
- Accept the defaults for the remaining parameters.
- Create another feature class for the road assessment, and name it Surface, and assign the Line feature class type.
- Add a field called SurfaceType and leave the data type as Text.
- Add StartTime and EndTime fields and use the data type Date.
- Accept the defaults for the remaining parameters.
- Right-click the database and select Domains.
- On the Domains tab, create two new domains.
- Create a domain named PotholeSize with two coded values: Large (Large >25cm) and Small (Small <25cm}.

- Click Save.
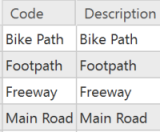
- Create another domain named SurfaceType with four coded values: Bike Path, Footpath, Freeway, and Main Road.
- Click Save.
Two domains are created.

- Create a domain named PotholeSize with two coded values: Large (Large >25cm) and Small (Small <25cm}.
- Add these domains to the appropriate feature class fields.
- In Catalog, browse to the Pothole Assessment.gdb file.
- Right-click the Pothole feature class, hover over Design, and select Fields to open the Fields tab.
This tab shows the fields for the Pothole feature class.
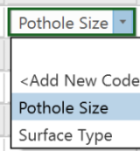
- In the Domain column of the Size field, click in the intersecting box.
A drop-down menu appears with the domains you created.
- Choose the Pothole Size domain.
- Click Save.
- Return to the feature class menu in the catalog and repeat step 13 for the SurfaceType feature class, but this time choose the Surface Type domain.
- Click Save.
- Select the two layers, right-click the selected layers, and choose Add to new map.
- In the Contents pane, right-click the Pothole layer and click Symbology.
- Click the drop-down menu and symbolize your layer by category using the Unique Values option.
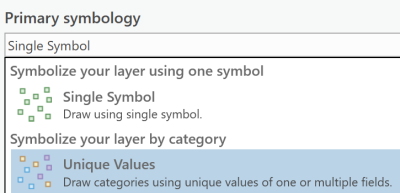
- If Size does not automatically appear in the field 1 option, choose Size from the drop-down menu.
- Click the add all values button
 .
. The Pothole layer has unique symbology for small and large potholes.
- Repeat steps 17–20 for the SurfaceType layer, creating unique symbology for the different surface types.
- Click Save.
- Click the Share tab in ArcGIS Pro.
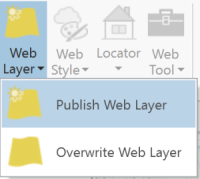
- Select Web Layer > Publish Web Layer.
- Type Potholes for the map name, summary, and tags.
- Select Feature for the layer type.
- Select an ArcGIS folder in which to save the layer.
- On the Configuration tab, click the edit tool next to Feature.
- Select the Enable editing and allow editors to box.

- Click Publish.

You now have a Pothole feature layer ready for use.
Create a layer view in ArcGIS
Creating a layer view from your hosted feature layer is recommended but optional. It is best suited for layers that you'll use in different applications. Using a layer view for your QuickCapture project means you can define symbology, or other properties, specifically suited to the project. In other applications, you may decide to use the original hosted feature layer or another layer view.
- Sign in to your ArcGIS organization.
- Browse to the folder where you saved your Pothole Assessment and click the hosted feature layer.
- Click Enable Attachments on the Pothole layer.
This allows you to capture points with a photo attachment.
- Click Create View Layer.
- Name your layer Pothole Assessment Project.
This will ensure that you build your QuickCapture project from the view that is designed for its use. You can modify the symbology for this view layer for use in the project, and the original symbology can still be viewed in other apps.
Create a QuickCapture project
The following steps describe how to create a QuickCapture project from your feature service. This section covers the creation and design process, as well as downloading and capturing points on your device.
- Open the QuickCapture website. Sign in to your ArcGIS organizational account.
ArcGIS Online
ArcGIS Enterprise
https://www.arcgis.com/apps/quickcapture?portalUrl=https://host.domain.com/webadaptor/ (where host, domain, and webadaptor are replaced by your portal information)
- Click New Project.
- Scroll down to Pothole Assessment Project and select it.
- Select Next.
A dialog box appears where you can confirm the thumbnail, title and data recovery email.
- Accept the default settings for the thumbnail and title. The data recovery email is there so that if something happens to the feature layer (for example, it gets deleted), the data collected can be recovered and sent to you. Enter your email address for this setting.
- Click Create.
Your QuickCapture project appears with the automatically generated capture buttons.
- Click the Pothole group label and configure the appearance of the group.
- Change the label of the group to Pothole Size.
- Change the number of columns to 2.
- Keep the default state and colors.
- Click Save.
- Click the button labelled Large in the Pothole group and change the Label to Large >25cm.
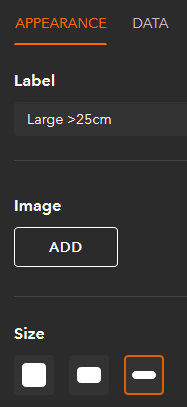
- Hold down Shift and click the button labelled Small to add it to the selection. This will ensure that subsequent changes to the appearance and data will be applied to both pothole buttons.
- Change the size of the button to the smallest size.
- Keep the default shape and colors.
- Click the Data tab (next to the Appearance tab).
- For each capture field (other than Size), click the drop-down arrow and choose Device Variable. Select the appropriate variables from the drop-down menu.
For example, the Latitude field should have the Latitude variable selected.
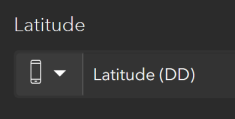
- Leave the data values for the Size field as they are coded values that are different for each button.
- Click Save.
- Deselect the Large >25cm button so that only the Small button is highlighted, Change the label to be Small <25cm.
- Optionally change the order of the buttons by dragging them to the desired order.
You cannot drop them into a different group.
- Change the order of the Surface buttons to Main Road, Freeway, Footpath, and Bike Path.
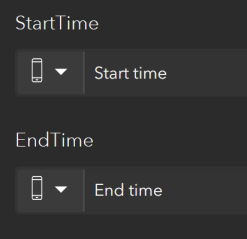
- Select each button in the Surface Type group by holding down Shift while clicking on each button and on the Data tab, add variables to each of the fields (similar to how you added variables for the pothole buttons).
Note:
You must fill in the capture fields with the variables or they will not automatically populate when the point is captured. This will leave blank spaces in your attribute table.
- Click the group border and change Number of columns to 2.
- Click Save.
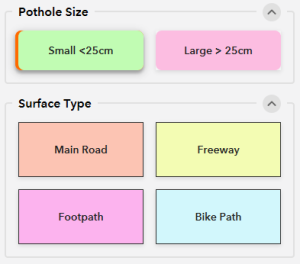
Your project preview looks similar to the following:
- Select both pothole buttons and click the Data tab (next to the Appearance tab).
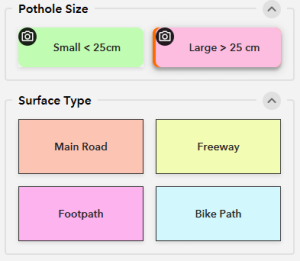
- Enable the Take Photo toggle button.
Two icons appear.
- Select the eye with the line through it.

This changes the camera mode to automatic, which allows you to capture the point and a photo without manually taking a picture. This option doesn’t allow a preview of the photo, so make sure when capturing your point, that your device’s camera is pointing at the pothole. This setting is best used when you need to capture the point quickly, for example, if you are driving a car and the camera position is already pointing to the road. If the Take Photo toggle button does not appear, confirm that you enabled attachments on your feature service.
Your project preview looks similar to the following:
- Click Save.
Next you will use the exclusivity groups options in the Settings menu to modify the surface type buttons. Exclusive groups prevent multiple line or polygon buttons from capturing data at the same time. In this example we will create an exclusivity group so you can't capture multiple surface types simultaneously.
- Click the Settings button and select Exclusive groups.
- Click New Group and name it Surface Type.
- Select all the buttons in the Surface Type group on the project preview, and then click Done.
- Click Save.
You can now download your project in the mobile app and test it. For others to be able to use your project, share it in your ArcGIS organization.